meta data for this page
Website
The JSCAD website can be used immediately by visiting the project website at www.openjscad.xyz
This is a great way to learn about JSCAD, view 3D and 2D designs, and create something new. That’s what 3D printing is about!
Viewing Designs
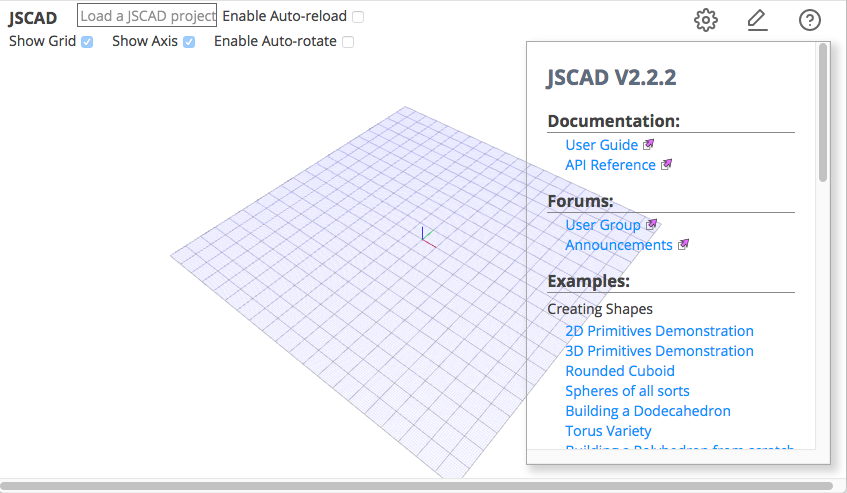
The website presents a page without an initial design, so select an example from the list under the (?) in the above right corner. Try the first example called '2D Primitives Demonstration'.
Just click the (?) again to close the list of examples.
The website presents a view of available 2D shapes, which is created from the contents of the example. The view can be rotated, zoomed in or out, and moved by using the mouse buttons. (Or fingers if using a tablet or mobile phone.)
This time open the editor from the 'pen' mark in the upper right corner. Just click inside the popup window, and the JSCAD design will be shown.
There’s not much else to learn, as you are already using JSCAD. You may want to try a few of the other examples, and explore some of the features of JSCAD.
Making Changes
While browsing examples, you may have noticed that the contents of the editor panel also changed. These are the actual designs, which were created by writing JSCAD scripts.
You can change each of the designs by opening the editor, and changing any of the values, etc.
Try it out. Open the '2D Primitives Demonstration' again, and change line 25. Just add '⁄⁄' in front of 'star'. Now hit RETURN+SHIFT.
Changing Parameters
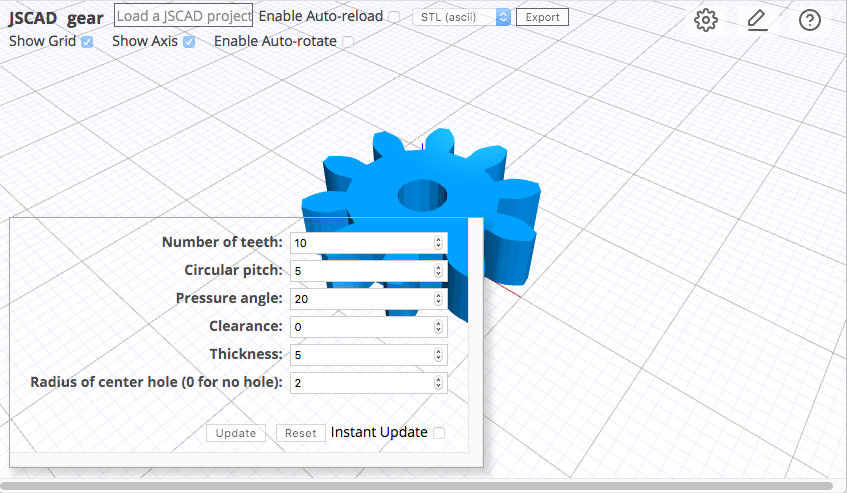
Some of the examples show a small panel on the lower left, which allows changes to the design parameters. For example, the “Parametric Involute Gear” example allows different values for “Number of teeth”. Change that to “20” then hit the Update button.
This is a unique feature of designs written in JSCAD. Any number of designs can be created by simply changing parameters.
Take the “Parametric Involute Gear” example for a spin. Click 'Instant Update'. Now change any of the parameters. Its really impressive, and fun.
Creating New Designs
Creating a new design is easy as well. Just make a copy of an example by cutting and pasting the script into your favorite text editor. Then save the file with an appropriate name and extension (.js) Now the file can be dragged and dropped to the website.
Make a few changes, then save the file. Now, drag and drop again.
There's more information on the Anatomy of A Design, etc. on the left. Have a quick read and have fun!
Exporting Designs
JSCAD was created for 3D printing enthusiasts. Any design can be exported to another format, e.g. STL meshes, SVG images, etc. The supported file formats are listed on the left.
Exporting is initiated by selecting the format, and pushing the Export button. A small pop-up window will be presented, allowing the contents to be saved as a file.
Sharing Designs
Designs can be easily shared with others as file attachments to mail, messages, etc.
In addition, a design (which is available online) can be shared using a special link (URL). You can copy and paste the link into many applications, and send. The design will be loaded and shown immediately. Here's how…
First, obtain the link (URL) to the online design content. Here's a link to a design on Thingiverse.
https://www.thingiverse.com/thing:1422172
By clicking on the “Thing Files”, the file called 'sliding-door-bolt.js“ will be shown. COPY the link shown while hovering over the “Download” button (This should be https://www.thingiverse.com/download:9621819)
This link (URL) can be provided as a parameter to the JSCAD website; www.openjscad.xyz
https://www.openjscad.xyz/?uri=https://www.thingiverse.com/download:9621819
Try it out!
Trouble Shooting Designs
Hopefully creating designs will be easy. The best approach is making small incremental changes and testing the results. Small parts can be created and tested separately, and brought together into the large design later.
However, there are times when all goes wrong, and some trouble shooting is required. First, make sure the browser has the 'browser tools' or 'developer tools' enabled, as the tools are turned off sometimes. Second, open the 'tools' which is just a menu selection.
The browser window will now have two sections; the JSCAD design and the tools. The tool of interest is the 'console', which shows errors, warning, messages, etc. This console can be cleared anytime, and will clear if the JSCAD design is reloaded.
What's so valuable about the console?
This will show more information about the errors. There should be a 'stack trace' as to where the error occurred.
Also, additional messages can be sent to the console, making trouble shooting easier. For example, the contents of a parameter can be sent to the console by:
console.log('parameter',parameter)
Hopefully, these pointers will be enough to trouble shoot any issues. If not then please contact User Group for some great help.
Install Locally
There is no need to install anything. Just jump to the project website at www.openjscad.xyz and start in.
However, for those who want more control, the website can be installed and used locally. The browsers of today can open locally installed or downloaded website content. And that means, you can download the project website, view and explore the contents, read the examples, etc. Here's how.
- Download ZIP from GitHub
- Place the ZIP file into a directory
- Unzip the contents
- Open the folder called OpenJSCAD.org-master
- Then open index.html which is found in packages/web
For those with a little more technical background, the download can be done from the command line.
- cd OpenJSCAD.org
- Then open index.html which is found in packages/web
And for those that want to make changes to the website, there is a guide on making changes.


